
Visual Testing(비주얼 테스팅)이란?
Visual Testing은 소프트웨어 애플리케이션의 사용자 인터페이스(UI)가 시각적으로 예상한 대로 표시되는지를 검증하는 테스트 방법이다. 이는 UI 요소의 위치, 크기, 색상, 레이아웃, 이미지 및 글꼴 등이 의도한 대로 나타나는지 확인하는 것을 목표로 한다. 기능적인 테스트와 달리, Visual Testing은 애플리케이션의 시각적 측면에 초점을 맞춰 사용자 경험의 일관성을 유지한다.
Visual Testing 적용시 기대 효과
- UI 일관성 유지: 새로운 기능 추가나 코드 변경으로 인해 의도치 않은 UI의 변화가 발생할 수 있다. Visual Testing은 이러한 변화를 조기에 발견하여 사용자에게 일관된 경험을 제공한다.
- 시간과 비용 절약: 수동으로 UI를 검토하는 것은 시간이 많이 소요되고 오류가 발생하기 쉽다. 자동화된 Visual Testing은 효율성을 높여준다.
- 사용자 만족도 향상: 시각적인 결함은 사용자에게 부정적인 인상을 줄 수 있다. Visual Testing을 통해 이러한 문제를 사전에 방지할 수 있다.
Cypress에서 적용해보기 Visual Testing적용해보기
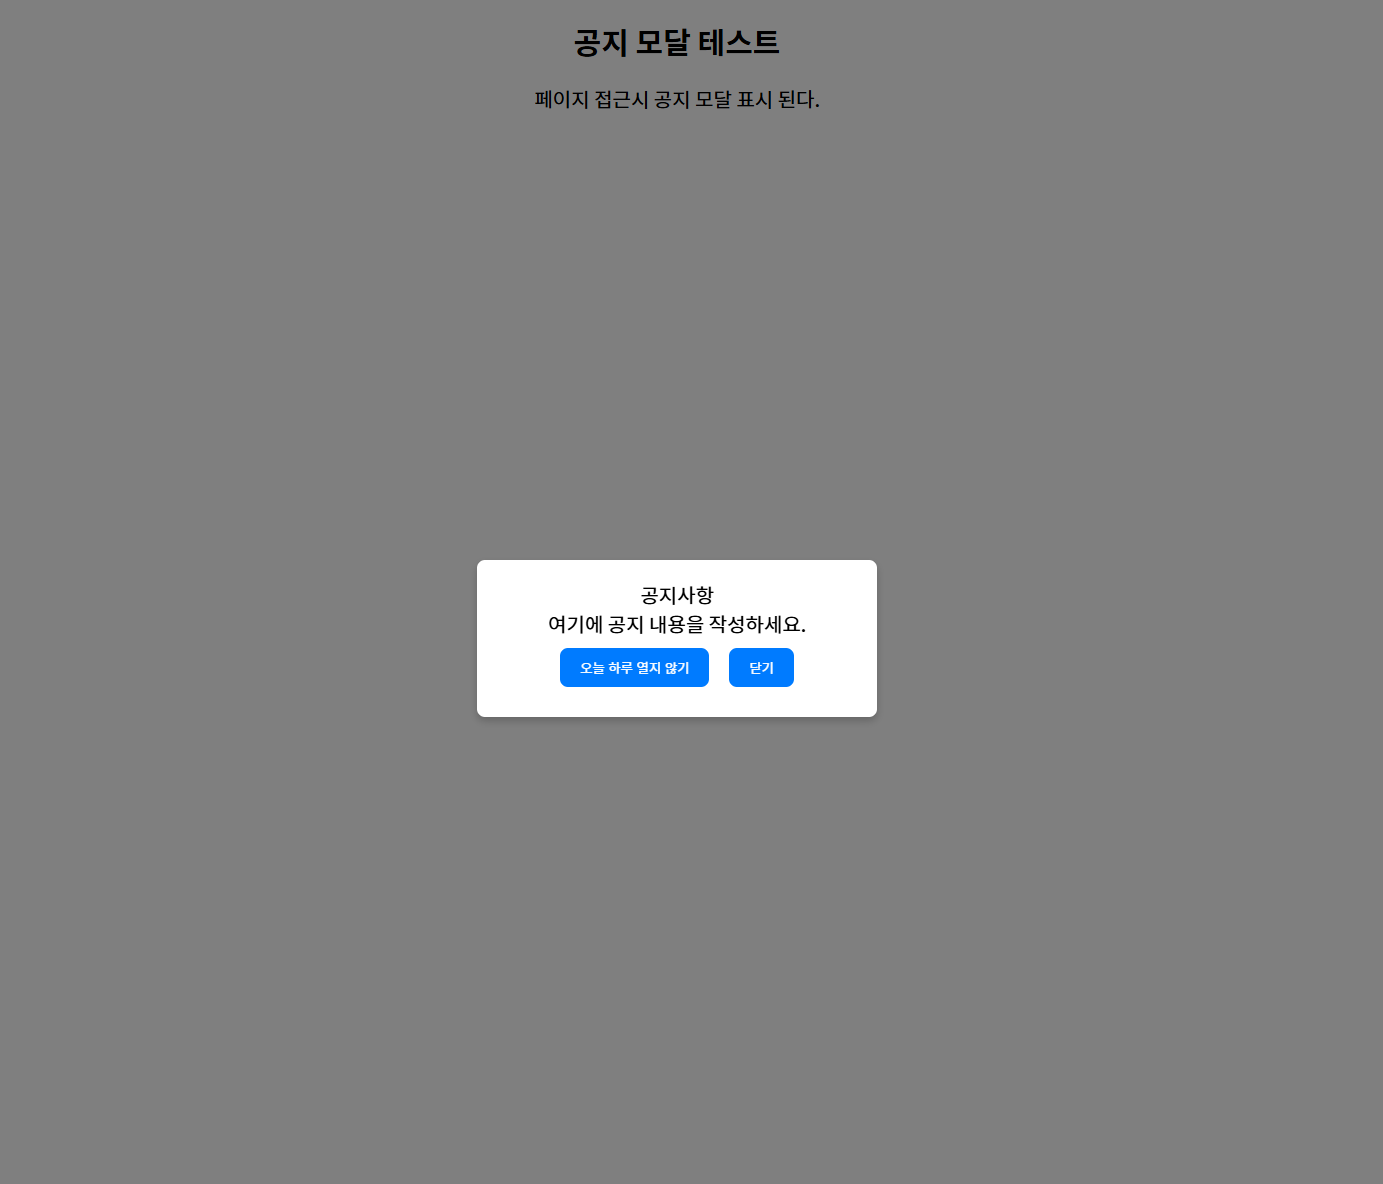
해당 화면에서 모달에 대한 Visual Testing을 적용 해보려고 한다.
테스팅에 사용한 라이브러리 : Cypress Image Snapshot
GitHub - simonsmith/cypress-image-snapshot: Catch visual regressions in Cypress with jest-image-snapshot
Catch visual regressions in Cypress with jest-image-snapshot - simonsmith/cypress-image-snapshot
github.com
라이브러리 설치
npm i @simonsmith/cypress-image-snapshot설정
Cypress.config.ts
import { defineConfig } from "cypress";
import {addMatchImageSnapshotPlugin} from '@simonsmith/cypress-image-snapshot/plugin'

export default defineConfig({
  e2e: {
    baseUrl: "http://localhost:5173/",
    setupNodeEvents(on, config) {
      addMatchImageSnapshotPlugin(on)
    },
  },
});
support/e2e.ts
import {addMatchImageSnapshotCommand} from '@simonsmith/cypress-image-snapshot/command'
import './commands'

addMatchImageSnapshotCommand({
  failureThreshold: 0.1, // threshold for entire image
  failureThresholdType: 'pixel', // percent of image or number of pixels
  customDiffConfig: { threshold: 0.1 }, // threshold for each pixel
  capture: 'viewport', // capture viewport in screenshot
  e2eSpecDir: 'cypress/e2e/'
})
옵션 설명
failureThreshold: 0.001, // 전체 이미지에 대한 임계값 설정
failureThresholdType: 'pixel', // 임계값의 단위 설정 ('percent' 또는 'pixel')
customDiffConfig: { threshold: 0.001 }, // 픽셀 단위 비교에 대한 임계값 설정
capture: 'viewport', // 스크린샷 캡처 방식 설정
e2eSpecDir: 'cypress/e2e/' //e2e 테스트 경로
tsconfig.json(typescript를 사용하는 경우)
해당 옵션은 타입스크립트를 사용하는 경우에만 적용한다.
"types": ["@simonsmith/cypress-image-snapshot/types"]테스트 코드 작성
describe('visual 테스트',()=> {
  it('visual 테스트',()=>{
    cy.visit('/modal-test')
    cy.get('#modal > div').matchImageSnapshot('modal');
  })
})- /modal-test 경로로 이동한다
- #modal > div의 경로에서 스냅샷을 찍는다
- Cypress/snapshots/{테스트_파일명} 경로에 스냅샷이 있으면 비교한다. (이미지가 없으면 이미지를 해당경로에 저장)
- 이미지 결과에 차이가 있으면 이를 /cypress/snapshots/__diff_output__. 에 저장한다.
테스트 실행
테스트 성공

테스트 실패

테스트 실패시 기존의 이미지와 얼마나 다른지 알려주고 /cypress/snapshots/__diff_output__. 경로에서 다른부분을 보여준다.
정확도 확인해보기

위 모달에서 CSS를 변경해 보면서 얼마나 정확한지 측정해보았다.
이미지 임계값 설정
임계값 : 0.01로 설정
Button BackgroundColor 변경
오차 : RGB(0,123,255) => RGB(0,123,247) 에서 에러 발생

Button BorderRadius 변경
오차 : 8px에서 +- 3px이 다를 경우 에러 발생

정확도는 CSS를 직접 비교하는 것보다 떨어질 수 있지만, UI 변화나 의도치 않은 스타일 오류를 빠르게 잡아내는 데 유용할거 같다.
'테스트 자동화 > Cypress' 카테고리의 다른 글
| Cypress에서 Window 객체 Stub하기 (앱 딥링크 테스트) (0) | 2024.10.02 |
|---|---|
| Cypress에서 POM(Page Object Model)사용하기 (0) | 2024.09.30 |
| n일 동안 보지 않기 모달 테스트 자동화 하기 (0) | 2024.09.28 |
| React프로젝트에서 Cypress 같이 실행하기 (0) | 2024.09.27 |
| Cypress를 사용한 자동화 테스트 구현하기 (소개 및 설치 방법) (0) | 2024.09.26 |